How Authors of Picture Books Format for Self-Publishing

Formatting a picture book is much more difficult than expected
If you are choosing to self-publish a children’s picture book, you need to consider what type of form your book is going to be printed in.
The form your book will be printed in will determine the following steps for formatting the book for printing.
Types of book formats:
Board Book
This is a book made of heavy cardboard and very difficult to destroy and is geared toward ages 0–3 years old. Mostly because these children are still learning about their environment, how to orient a book and turning pages from left to right. They often have a longer lifespan than most book formats.
However, if self-publishing, you may need to find a press that is willing to print this type of book as it requires different materials.
Paperback Books
This book is made with a soft cover and easy-to-flip, flexible pages with an age range of 3–9 dependent upon the reading level. All self-publishing platforms produce these and can be printed with ease.
Hardcover Books
This book is made with a hard cover exterior of heavy cardboard, wrapped in a glossy veneer. With easy-to-flip, flexible pages, the age range is 3–9 depending upon the reading level. Some of the self-publishing platforms produce these but they do have requirements for how many pages they must contain.
Each of these book forms serves a particular age range on the horizon of readers.
Here is a breakdown of age groups for books:
Board books: Newborn to age 3
Picture books: Ages 3–8
Coloring and activity books: Ages 3–8
Novelty books: Ages 3 and up
Early, leveled readers: Ages 5–9
First chapter books: Ages 6–10
Middle-grade books: Ages 8–12
Young adult (YA) novels: Ages 12 and up
Once you determine the age range and book form you want to create for your target audience, you need to know to the size of your book.
Just as in other portions of the book publishing industry, there are industry-size guides for children’s picture books as well. These are the sizes recommended as the most cost-effective for print-on-demand.
Popular Mid-Sized Children’s Picture Books
8″ × 8″ (square)
8″ × 10″ (portrait)
10″ × 8″ (landscape)
Suggested Print Sizes from Popular Self-Publishing Presses such as Amazon and Ingram Spark (They only offer paperback and hardcover options, no landscape printing options.)
7″ × 10″ (portrait)
7.25″ × 9.25″ (portrait, same size as Book Design Made Simple)
8″ × 8″ (square)
8″ × 10″ (portrait)
8.5″ × 8.5″ (square)
8.5″ × 11″ (portrait)
Board Book Sizes
These typically range 5” x 5” to 10” x 10”
In the world of self-publishing, these are going to be the most accessible sizes for indie authors and the most cost-effective for print-on-demand.
The next step of your formatting process is knowing your margins, the areas where the page cuts off around the outside.
Margins and bleed are some of the most tricky portions of the whole formatting process as you want to be sure you can see your full image without having to distort it.
This is why choosing to create larger illustrations saves you time later as you can shrink them later to the desired size you need.
A good rule of thumb is to consider leaving 0.5’ of space on the top, bottom, inside, and outside of the illustration. Doing so will prevent any crucial portions of your image or text to be cut off from the reader in the final product.
When composing a full-spread illustration, consider carefully what is placed in the middle of that illustration as it could be cut off in the crease of the book where the pages meet.
If you have hired an artist to do this work for you, be sure to work closely with them when directing them on how the images will be laid out on the final product. If this problem occurs, you may need to get permission to edit the images to fit the margin and formatting needs.
If you decide that you want to format the book on your own, it is possible to do so with tools like Canva.com.
Something that many writers don’t know about Canva is that they offer templates for creating children’s picture books.
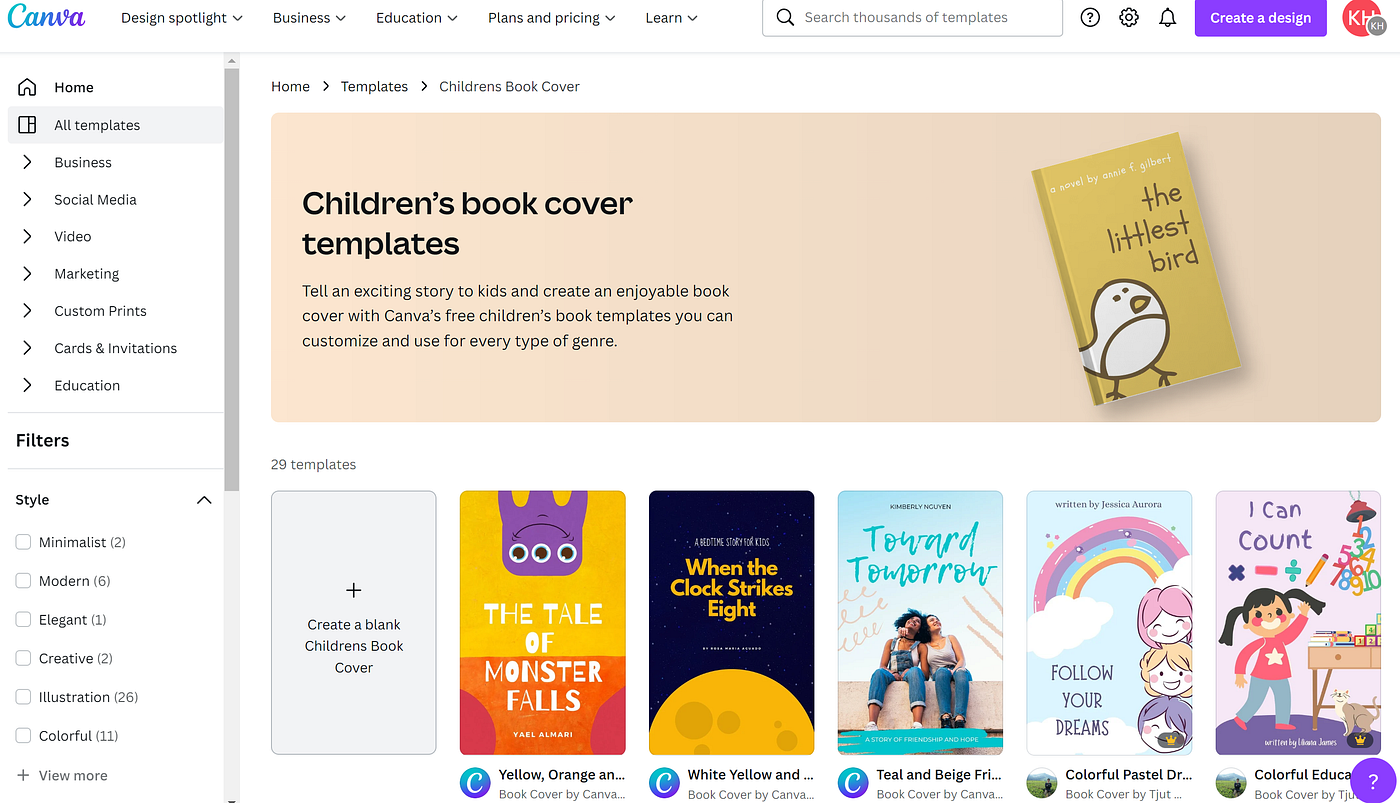
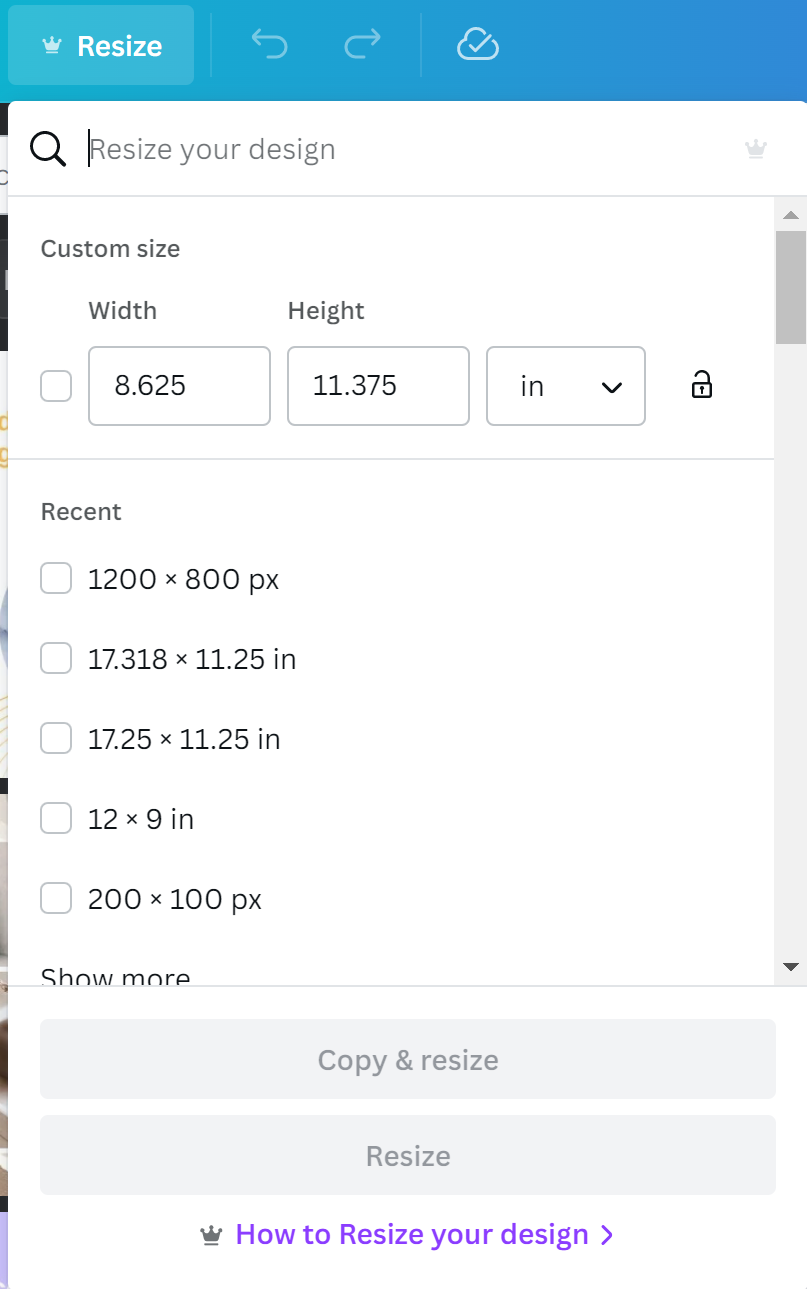
Once you choose something that works for you, you can adjust the size by selecting the Resize option and typing in the desired size you want for your book.
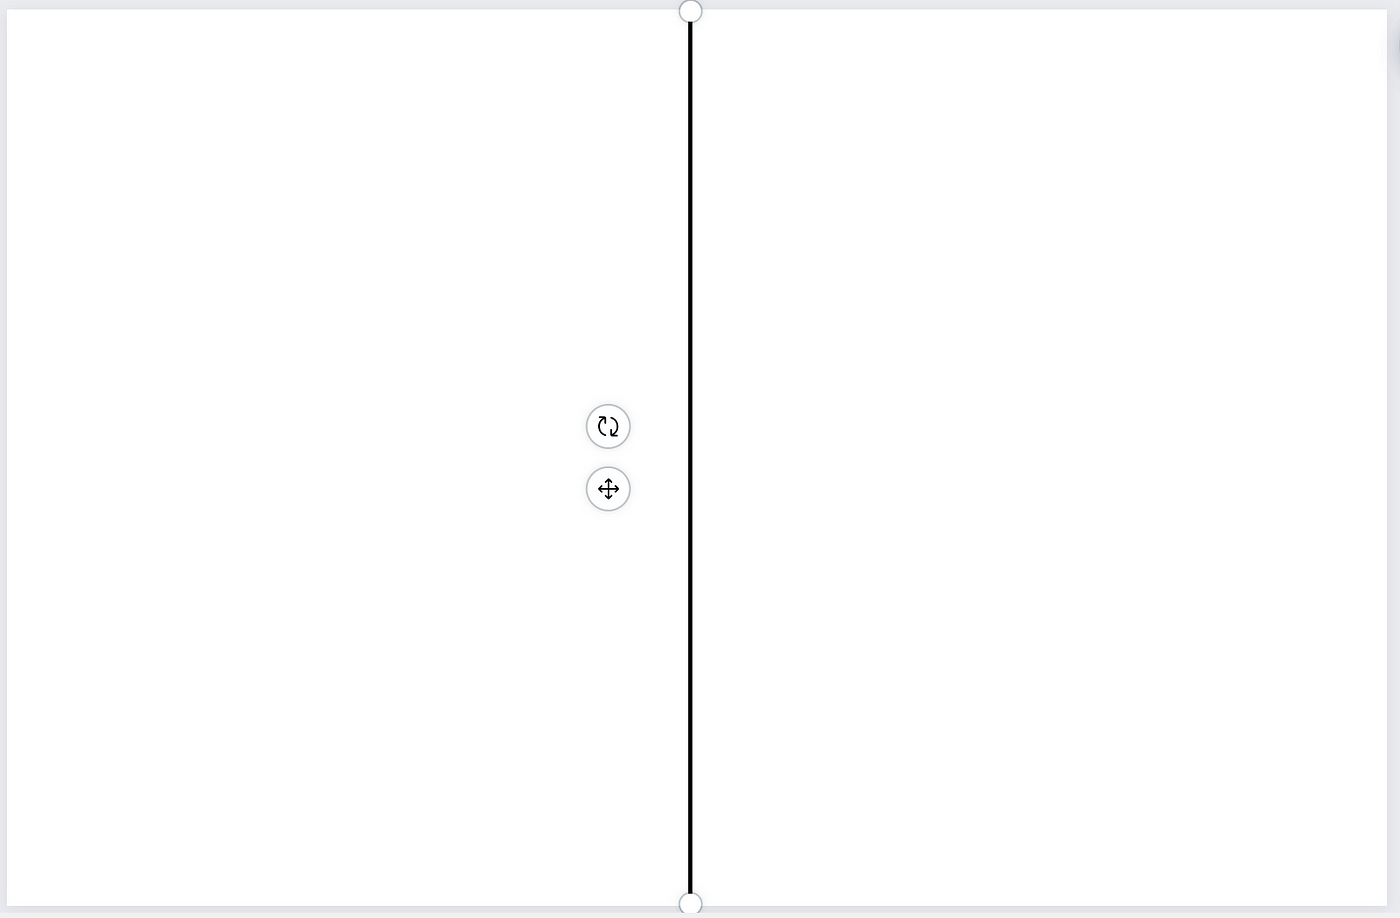
Once you have everything loaded into your book file, another great idea before you begin downloading the file is to see how it looks in a PDF Print format, it’s good to place the side of the page by side to see the flow of the book.
You can do this by creating a new Canva project with a size of 16” width x 10” height. Place a line in the center of the file to mark the middle of the book or the crease, and then place your pages as they would be when the book is formatted.
Should look like this:
After you place your images in, they should look something like this:
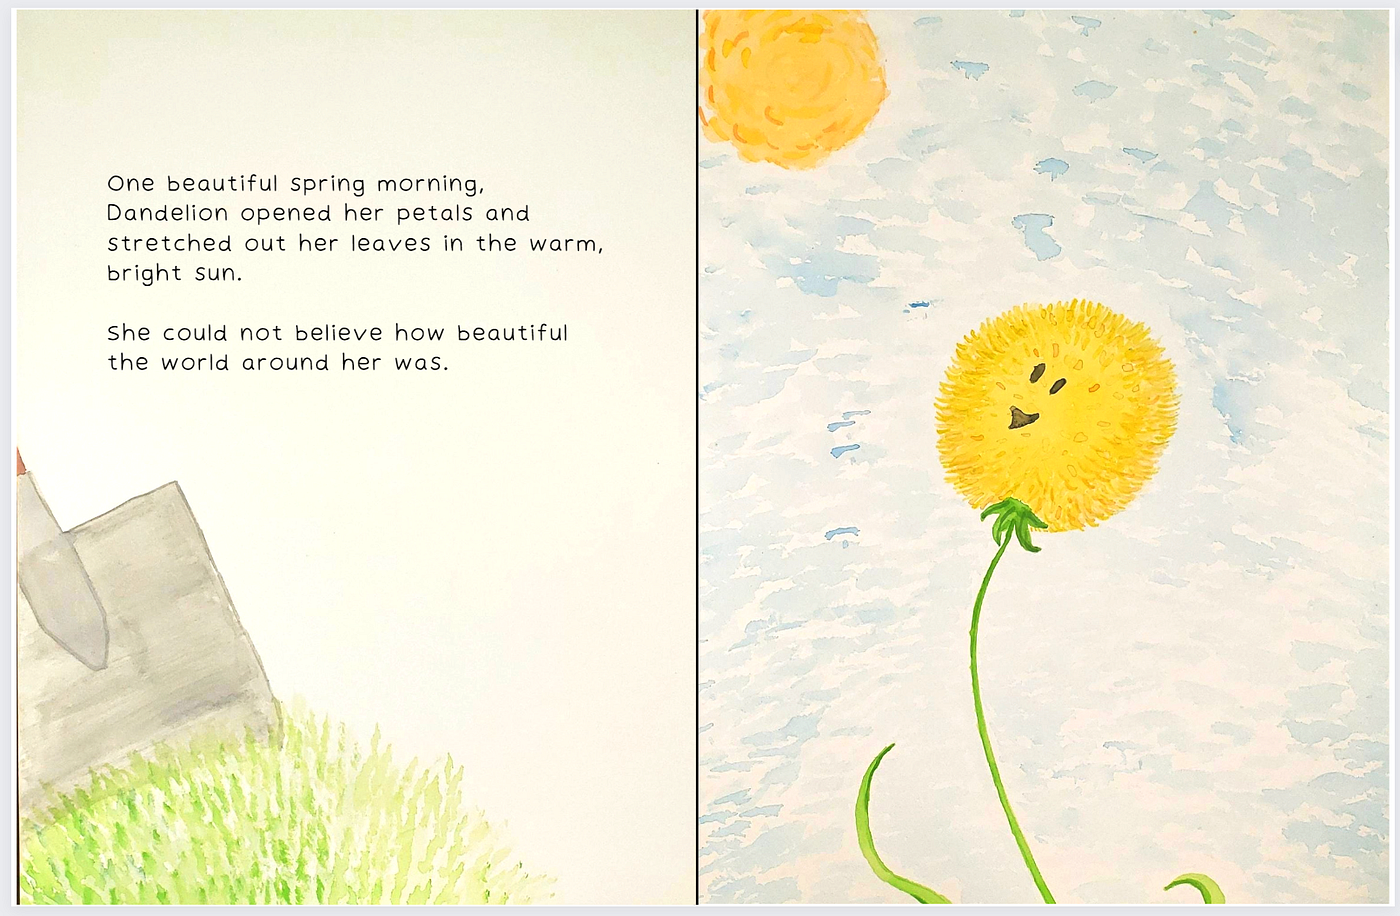
By doing this ahead, you can eliminate later changes you will need to make to the book if there are portions of your image or text that become cut off.
Once you are sure that all of your images look good in the full spreads as listed above, download a PDF Print version of the single-page document of your book and see how it looks.
Any adjustments that may be needed will come at uploading time when you are putting the document on a platform such as Amazon’s KDP, Book Baby, Ingram Spark, Kobo Books, or Draft to Digital.
For two-page spread images
For formatting two-page spread images, the best way to see how they will look during formatting is by placing a line in the center of the spread.
This will show you where the pages will cut off at the binding of the book and allow you to make adjustments accordingly.
The best way to proceed afterward will be to crop the spread in half and place each half on separate pages.
Whatever choices you choose, remember that formatting takes time to get it right, especially with children’s picture books.
Take your time and decide the right format for your audience and get ready to get your ideas in front of readers.